This documentation is intended to cover the advanced functionality of the 15VP v5.2 flashlight driver. In normal use you shouldn’t need any of it, but it’s fun to have there should you want to customize things.
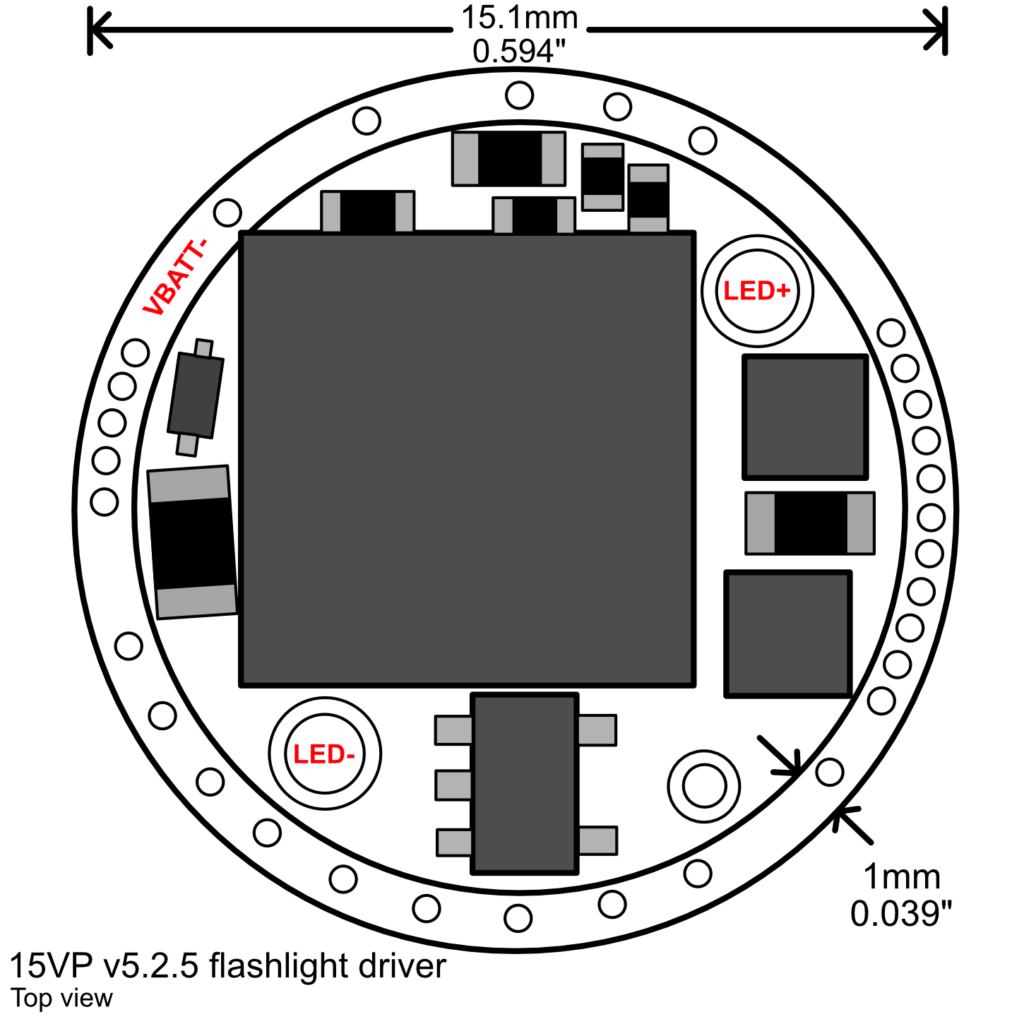
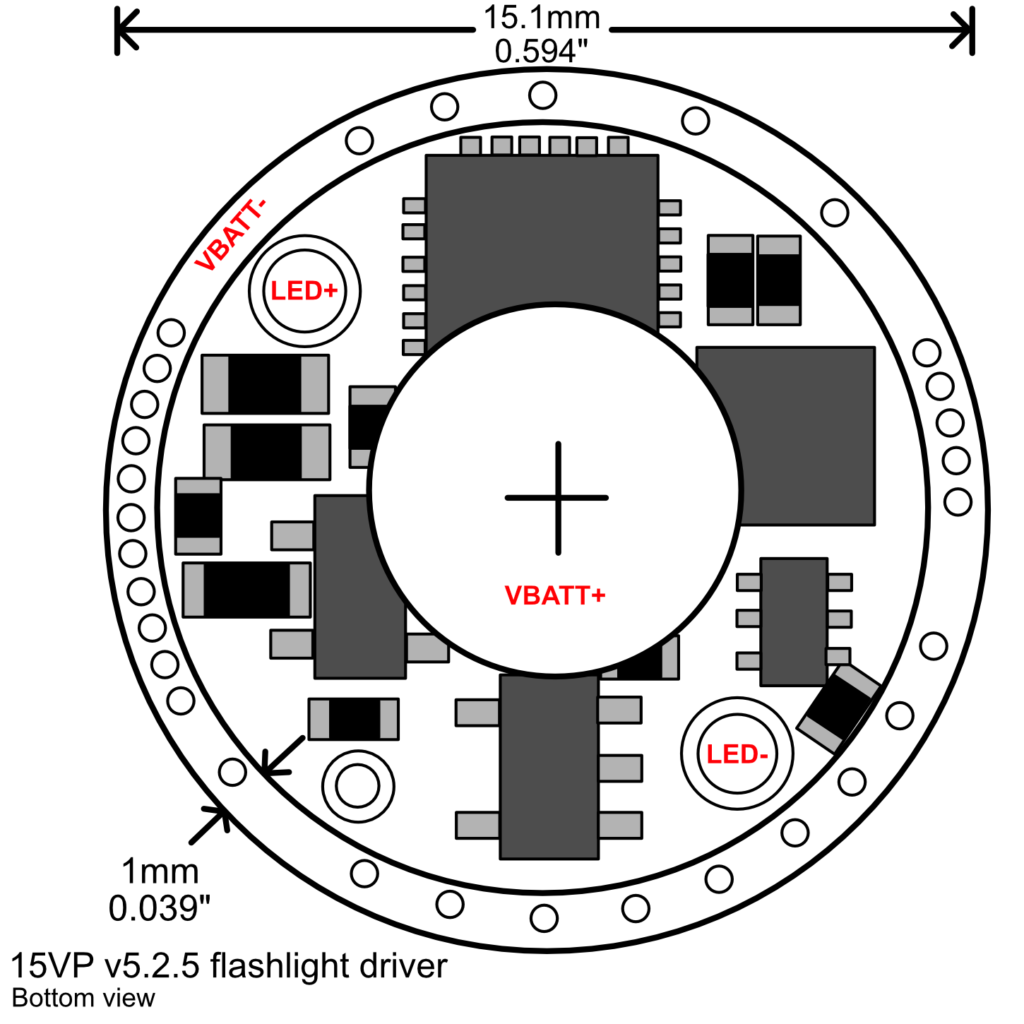
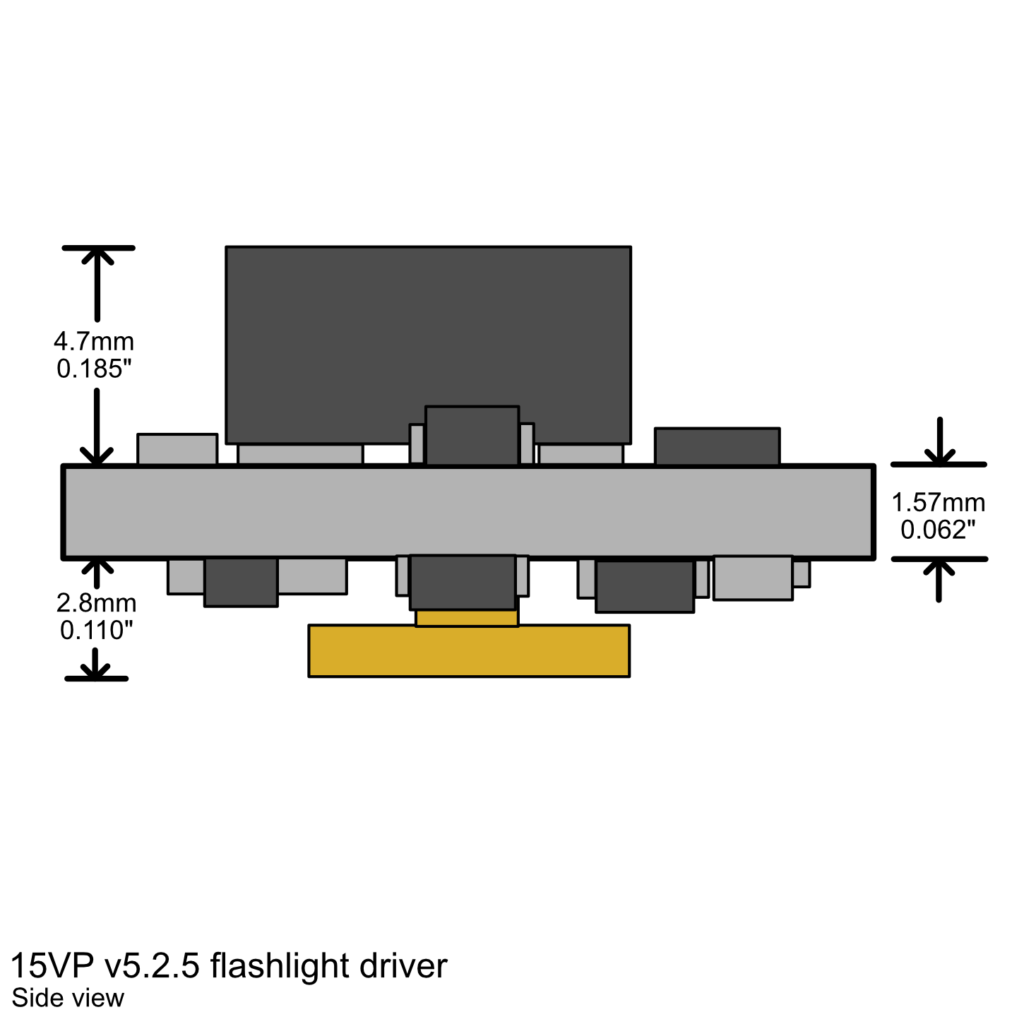
Physical Layout
Quick Reference Guide
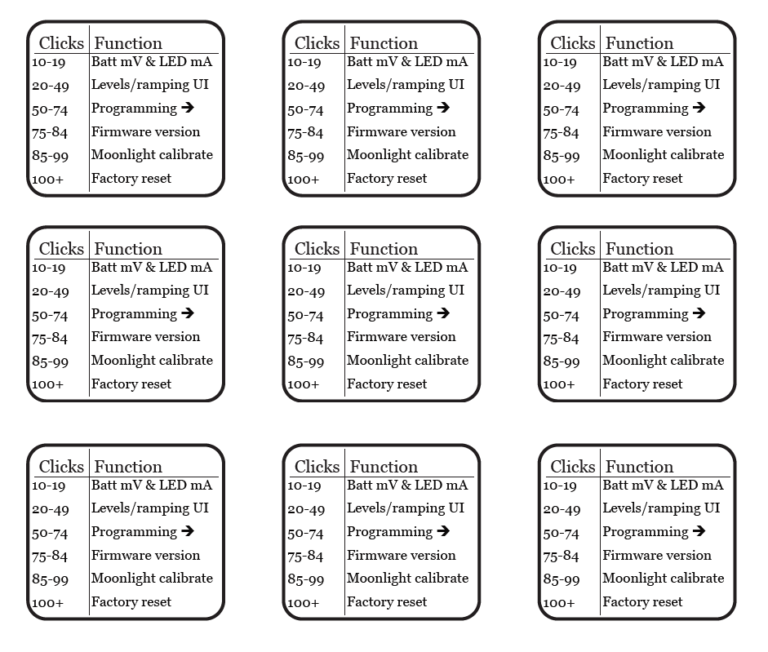
Print out this double-sided PDF, cut out one of the guides, roll it around a AA battery, and insert it into the battery tube. Now anytime you want to customize your driver, you have the instructions readily available!
Tutorial Videos
Quick Access Menu
| Clicks | Light Show | Functionality |
|---|---|---|
| 10-19 | None | Flash out battery voltage & LED current |
| 20-49 | Quick low->high->low ramp | Switch between discreet and ramping UI’s |
| 50-69 | Quick double-blink | Enter programming menu |
| 70-79 | Quick low->high ramp | Flash out firmware version |
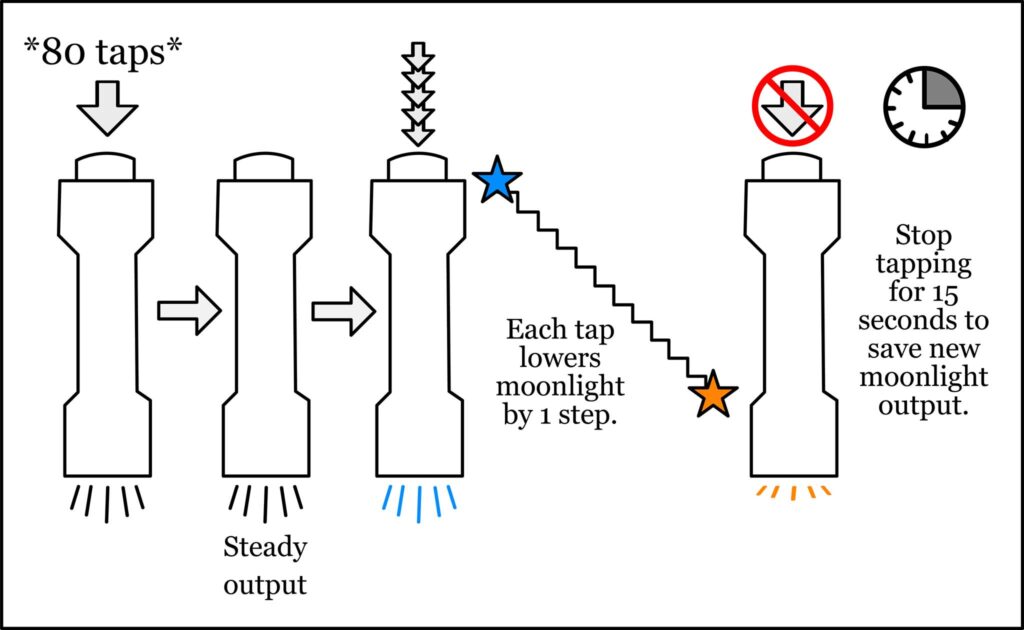
| 80-89 | Quick triple-blink | Moonlight calibration subroutine |
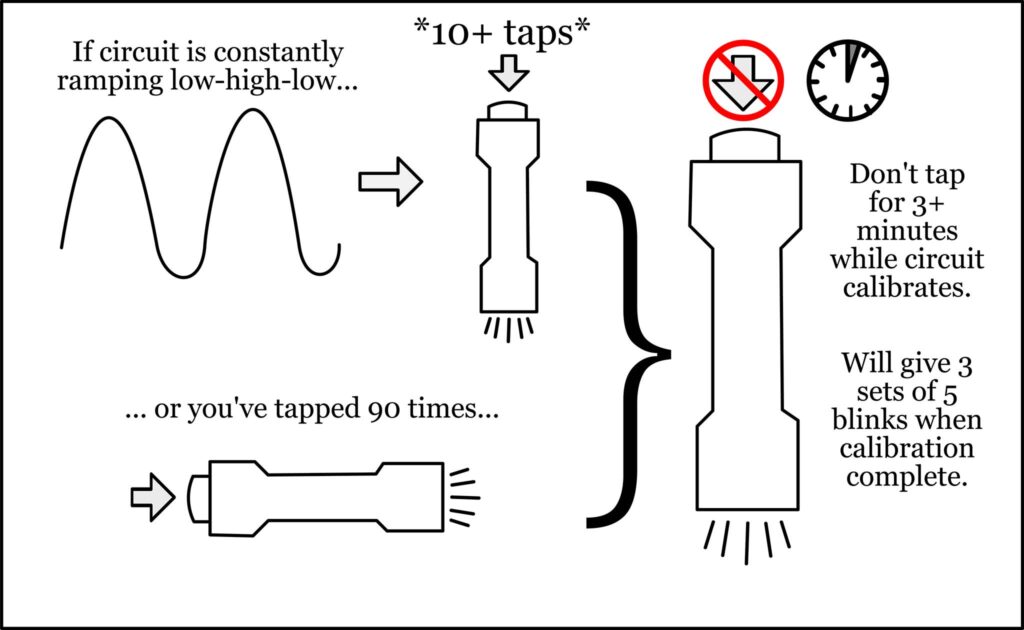
| 90-99 | Quick quintuple-blink | Primary LED calibration subroutine |
| 100+ | Furious flashing | Factory reset |
Programming Menu
| Setting | Light Show | Functionality |
|---|---|---|
| # of outputs | 1 blink | Set number of outputs from 1-4 |
| Output 1 Brightness | 2 blinks | Select brightness from 24 levels |
| Output 2 Brightness | 3 blinks | Same as above. Only appears if # outputs > 1 |
| Output 3 Brightness | 4 blinks | Same as above. Only appears if # outputs > 2 |
| Output 4 Brightness | 5 blinks | Same as above. Only appears if # outputs > 3 |
| Mode Memory | 6 blinks | Style of mode memory (none, classic, hybrid) |
| Debounce | 7 blinks | Ignore accidental clicks (off, short, med, long) |
| Stepdown | 8 blinks | Stretch runtime by lowering output (off, on) |
| 3V Mode | 9 blinks | Enable 3V battery support (off, on) |
Factory Defaults
From the factory, your circuit ships with the follow defaults set:
| Setting | Default Value | Notes |
|---|---|---|
| # outputs | 4 | |
| Output 1 Brightness | Level 0 | 4mA (1.5V) / 4ma (3.7V) |
| Output 2 Brightness | Level 6 | 16mA / 16mA |
| Output 3 Brightness | Level 15 | 124mA / 124mA |
| Output 4 Brightness | Level 24 | 550mA / 925mA |
| Mode Memory | none | |
| Debounce | Medium | |
| Stepdown | Enabled | “Battery-stretch” to prevent strain on cell |
| 3V Mode | Disabled | |
| Click Length | Medium |
Battery Protection
The following thresholds are configured for low-voltage protection:
| Voltage Source | Low Voltage Warning | Low Voltage Shutdown | Notes |
|---|---|---|---|
| 0.9 – 1.9V | 0.950V | 0.800V | |
| 1.91 – 3.3V | 2.7V | 2.5V | If 3V Mode enabled |
| 3.31 – 4.5V | 3.3V | 2.9V |
Thermal Protection
The 15VP circuit has built-in thermal protection. If the temperature of the microcontroller exceeds 330 Kelvin (57°C or 134.33°F) the circuit will step-down output by 2 brightness levels. Temperature is measured every 20 seconds and the circuit will continue to stepdown until the temperature limit is reached.
Light Shows
Your driver may decide to display a little light-show while you’re using it! Refer to this table to decode what it’s trying to tell you.
| Light Show | Operation | Notes |
|---|---|---|
| 0 blinks & tiny brightness decrease | Over-current stepdown | Current too high |
| 1 very quick blink & brightness decrease | Thermal stepdown | Circuit too hot |
| 2 very quick blinks & brightness decrease | Low-voltage stepdown | Battery low |
| 2 slower blinks & brightness the same | Low-voltage notification | Battery low |
| 3 hi-lo ramps to lo brightness; blinks every 5s | Low-voltage shutdown | Battery dead |
Output Levels
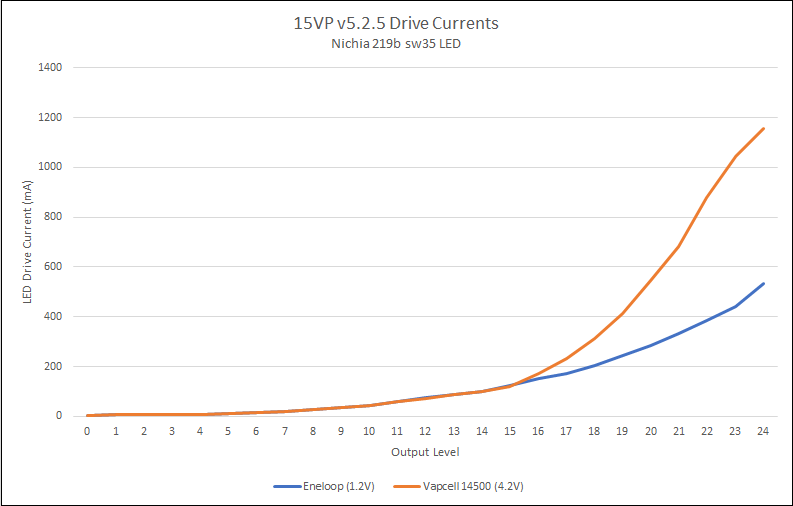
The 15VP has 25 output levels with 2 output curves (1.5V and 3.7V). The approximate milliamp current for each driver level is as follows:
1.5V: 1,3,5,7,9,11,16,20,28,35,43,59,74,86,99,124,151,173,206,244,286,332,385,442,550
3.7V: 1,3,5,7,9,11,16,20,28,35,43,59,74,86,99,124,144,199,264,352,462,579,746,875,925
Appendix
The nitty-gritty details of each setting can be found below!
Battery & Current Readout
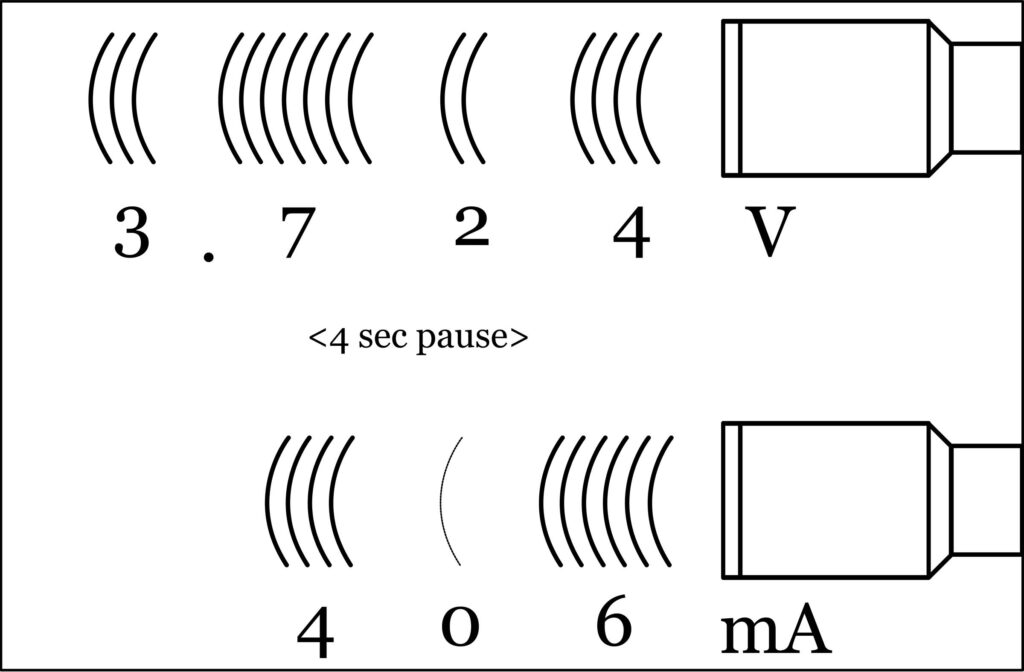
The circuit measures both the battery voltage and LED current, then flashes them out.
User Interface
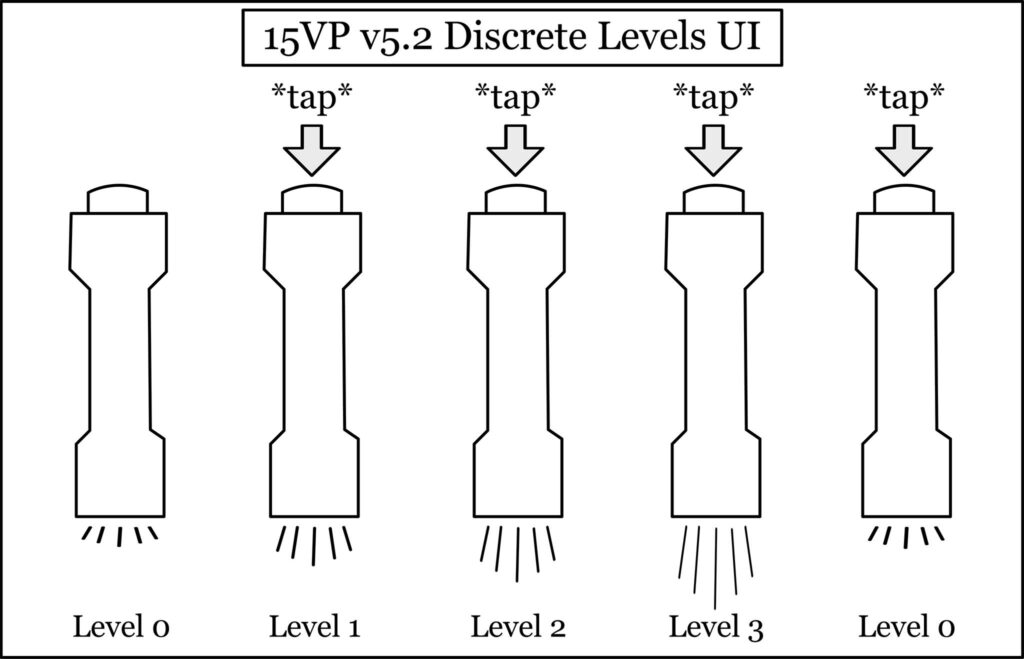
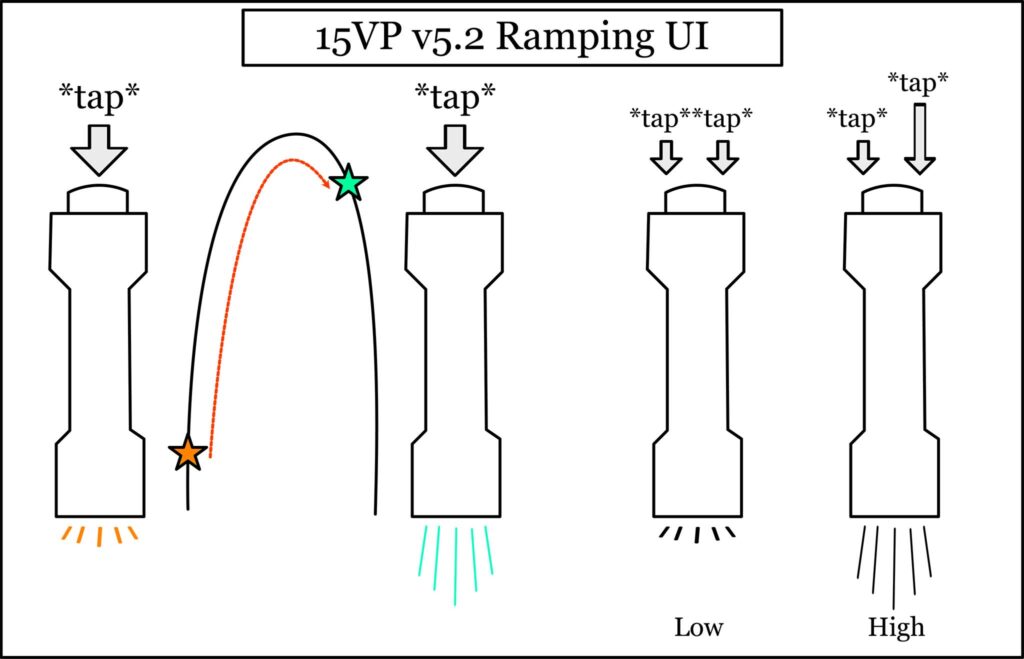
The 15VP v5.2 circuit features two different user interfaces (UI’s). You can switch between them at will. They allow you to control the brightness in different ways.
Firmware Version
Just as with the voltage/current readout, this function will flash out the current firmware version.
Moonlight Calibration
The lowest output of the circuit (Level 0 of 24) can be fine-tuned using this subroutine. The calibration value is remembered across battery changes. If you factory reset, you will need to do this again.
Primary LED Calibration
After a factory reset, you must calibrate the primary LED. This must be done twice:
- Once with a fully-charged 1.2V Eneloop
- Once with a fully-charged 4.2V lithium-ion cell
Calibration takes approximately 1 minute – your light will ramp slowly down measuring LED current and setting values appropriately. When calibration is complete, a small light show (3 sets of 5 blinks) will occur. You can re-run calibration at any time from the Quick Access Menu.
